Before & After Image Comparison
Blink Test, Split Wipe & Pixel Diff
The comparison that actually shows you the difference.
Most tools give you a draggable slider between two images. This one gives you that plus blink comparison, pixel-level diff, multi-state support, and export.
SEE IT WORK
Every edit, surfaced as movement
Before and after stop being two pictures you study and become one picture where the edit is the only thing that flinches.
Pick the right tool for the job
Different kinds of changes call for different comparison techniques. You get all three in one place.
Blink Mode
Rapidly alternates between your before and after images at adjustable speed. Your brain's change-detection system instantly flags every difference, even ones you'd miss in a side-by-side view. This is the fastest way to answer "did anything actually change?"
Best for: Quick overall assessment, catching unintended changes
Split Wipe
A draggable divider you can move across the image to reveal the before or after version underneath. Perfect for inspecting specific regions in detail: skin retouching, background changes, color grading adjustments.
Best for: Regional inspection, client presentations, portfolio showcases
Pixel Diff
Generates a heatmap showing the mathematical difference between every pixel. Changed areas glow bright; unchanged areas stay dark. This gives you an objective, quantifiable view of exactly what was modified and what wasn't.
Best for: QA verification, compression analysis, technical evaluation
Who uses before & after comparison
📸 Photographers & Retouchers
Compare your raw file against your edit. Verify skin retouching is consistent. Check that color grading didn't shift unintended areas. Show clients exactly what you changed, or prove that the requested edits are done.
🎨 Designers & Illustrators
Compare design revisions. Verify layout changes between versions. Check that a logo tweak didn't break alignment elsewhere. Compare exported file formats to check for quality loss.
🏠 Real Estate & Renovations
Document renovation progress with before/after comparisons. Create compelling listing visuals. Show property transformations to clients and investors with pixel-accurate alignment.
💪 Fitness & Health Progress
Compare progress photos with consistent framing. The blink mode makes even subtle body composition changes visible. Export comparisons as shareable images for social media.
🖥️ Web Developers
Screenshot your page before and after a CSS change. The pixel diff heatmap shows exactly what moved, what reflowed, and what stayed put. Catch visual regressions before your users do.
🤖 AI Art Iteration
Compare outputs from different prompts, settings, or models. Blink through 50 AI-generated variants to find the best one. See the dedicated AI art comparison page →

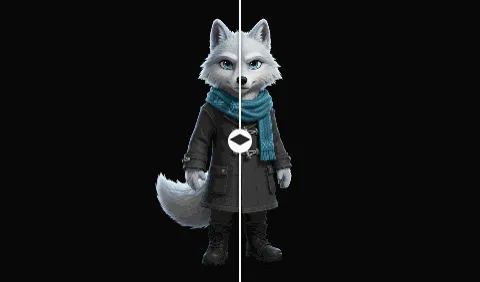
Before (left) and after (right): drop both in and blink to see every difference instantly.
Everything a slider tool doesn't give you
Slider widgets are everywhere. Here's what this tool adds on top.
Multi-State Comparison
Compare up to 50 versions, not just two. Blink through them all against a single reference.
Pixel-Level Diff
Not just visual: mathematical. See exactly which pixels changed and by how much.
GIF & Video Export
Export your before/after as an animated GIF or MP4 — for Instagram, TikTok, a portfolio, or client delivery. The video comes out at your source resolution, not a forced downscale.
Scene Compositing
Layer your before/after into a styled composition with text, frames, and effects, then export as a single image or animation.
Save Projects Locally
Projects persist in your browser's storage. Close the tab, come back later: everything's still there.
Instant Results
Drop images in and comparison starts immediately. Diff generation, blink playback, and export all happen at native speed.
How to compare before and after images
The simplest workflow takes about 30 seconds. Open Compix, drop your "before" image into the anchor zone on the left panel, then drag your "after" image into the states area. Compix immediately displays your anchor image on the canvas. Click on your state to activate it, then switch between comparison modes using the toolbar.
For blink comparison, hit the play button. Compix will rapidly alternate between your before and after images. You can adjust the blink speed: faster intervals (200ms) are best for catching any change at all, while slower intervals (1–2 seconds) give you more time to examine each version. This technique leverages how the human visual system detects change through motion, the same principle astronomers used to discover moving objects in the night sky.
For split wipe, drag the divider across the image. This is ideal when you want to inspect a specific region: checking whether a background replacement has a clean edge, or whether a color grade transitions smoothly across a face.
For pixel diff, Compix generates a heatmap overlay. Bright areas indicate significant change; dark areas indicate no change. This is particularly useful for quality assurance: confirming that an edit only affected the intended region, or checking whether a file conversion introduced compression artifacts.
Comparing more than two images
Unlike standard before/after slider tools that are limited to two images, you can add up to 50 states. This is useful for comparing multiple editing approaches, different filter presets, or a series of revision rounds. The blink mode cycles through all enabled states, so you can quickly scan across many versions to find the best one.
Exporting your comparison
Once you've settled on your final version, you have several export options. Export a single frame as PNG. Create an animated comparison as a GIF or MP4, useful for portfolio posts or client presentations. Or switch to Scene mode to build a styled comparison layout with both images side by side, layered, or arranged in a custom composition.
Common questions
How is this different from an online before/after slider? ▸
Do my images get uploaded? ▸
Can I export the comparison as a GIF for social media? ▸
What image formats does it support? ▸
Does it work on mobile? ▸
Compare Lightroom presets: what the backslash key can't do
Lightroom's built-in before/after toggle (the backslash key) shows your original RAW against your current edit. Useful, but it only has one "before." There's no built-in way to compare two different presets applied to the same image, two different edit directions, or two export settings side by side.
The workflow: apply Preset A, export as a high-quality JPEG. Switch to Preset B, export. Open both in Compix: anchor one, add the other as a state. Blink at 300ms. The better preset becomes obvious in under ten seconds, not because you're analyzing it, but because your visual system registers the stronger image directly. No toggling. No memory required.
The same method works for comparing Capture One styles, checking whether a specific edit decision (warmer shadows, lifted blacks, a different clarity amount) actually improved the image, or comparing two export quality settings for file size versus visual quality tradeoffs. See also: retouching QA tool for professional pre-delivery checks →
Comparing client images safely
If you're comparing edits on client portraits, wedding photos, or event coverage, the comparison tool you use matters. Compix processes everything locally: your client's images never leave your machine. Compix also works fully offline as a PWA, which means you can use it on location, in a client review session, or anywhere without internet. See also: pixel diff heatmap for technical verification →
More from Compix
Compare Upscaled Images
Compare Topaz Gigapixel, Real-ESRGAN, SwinIR, and Lightroom Enhance outputs side by side. Open →
Scene Compositor
Layer your before/after into styled compositions, moodboards, or animated sequences. Open →
Visual Comparison Tool
The full platform overview: every comparison and compositing mode in one workspace. Open →
See the difference — literally.
Drop in your before and after. Three comparison modes. Instant results.
Open the split wipe →